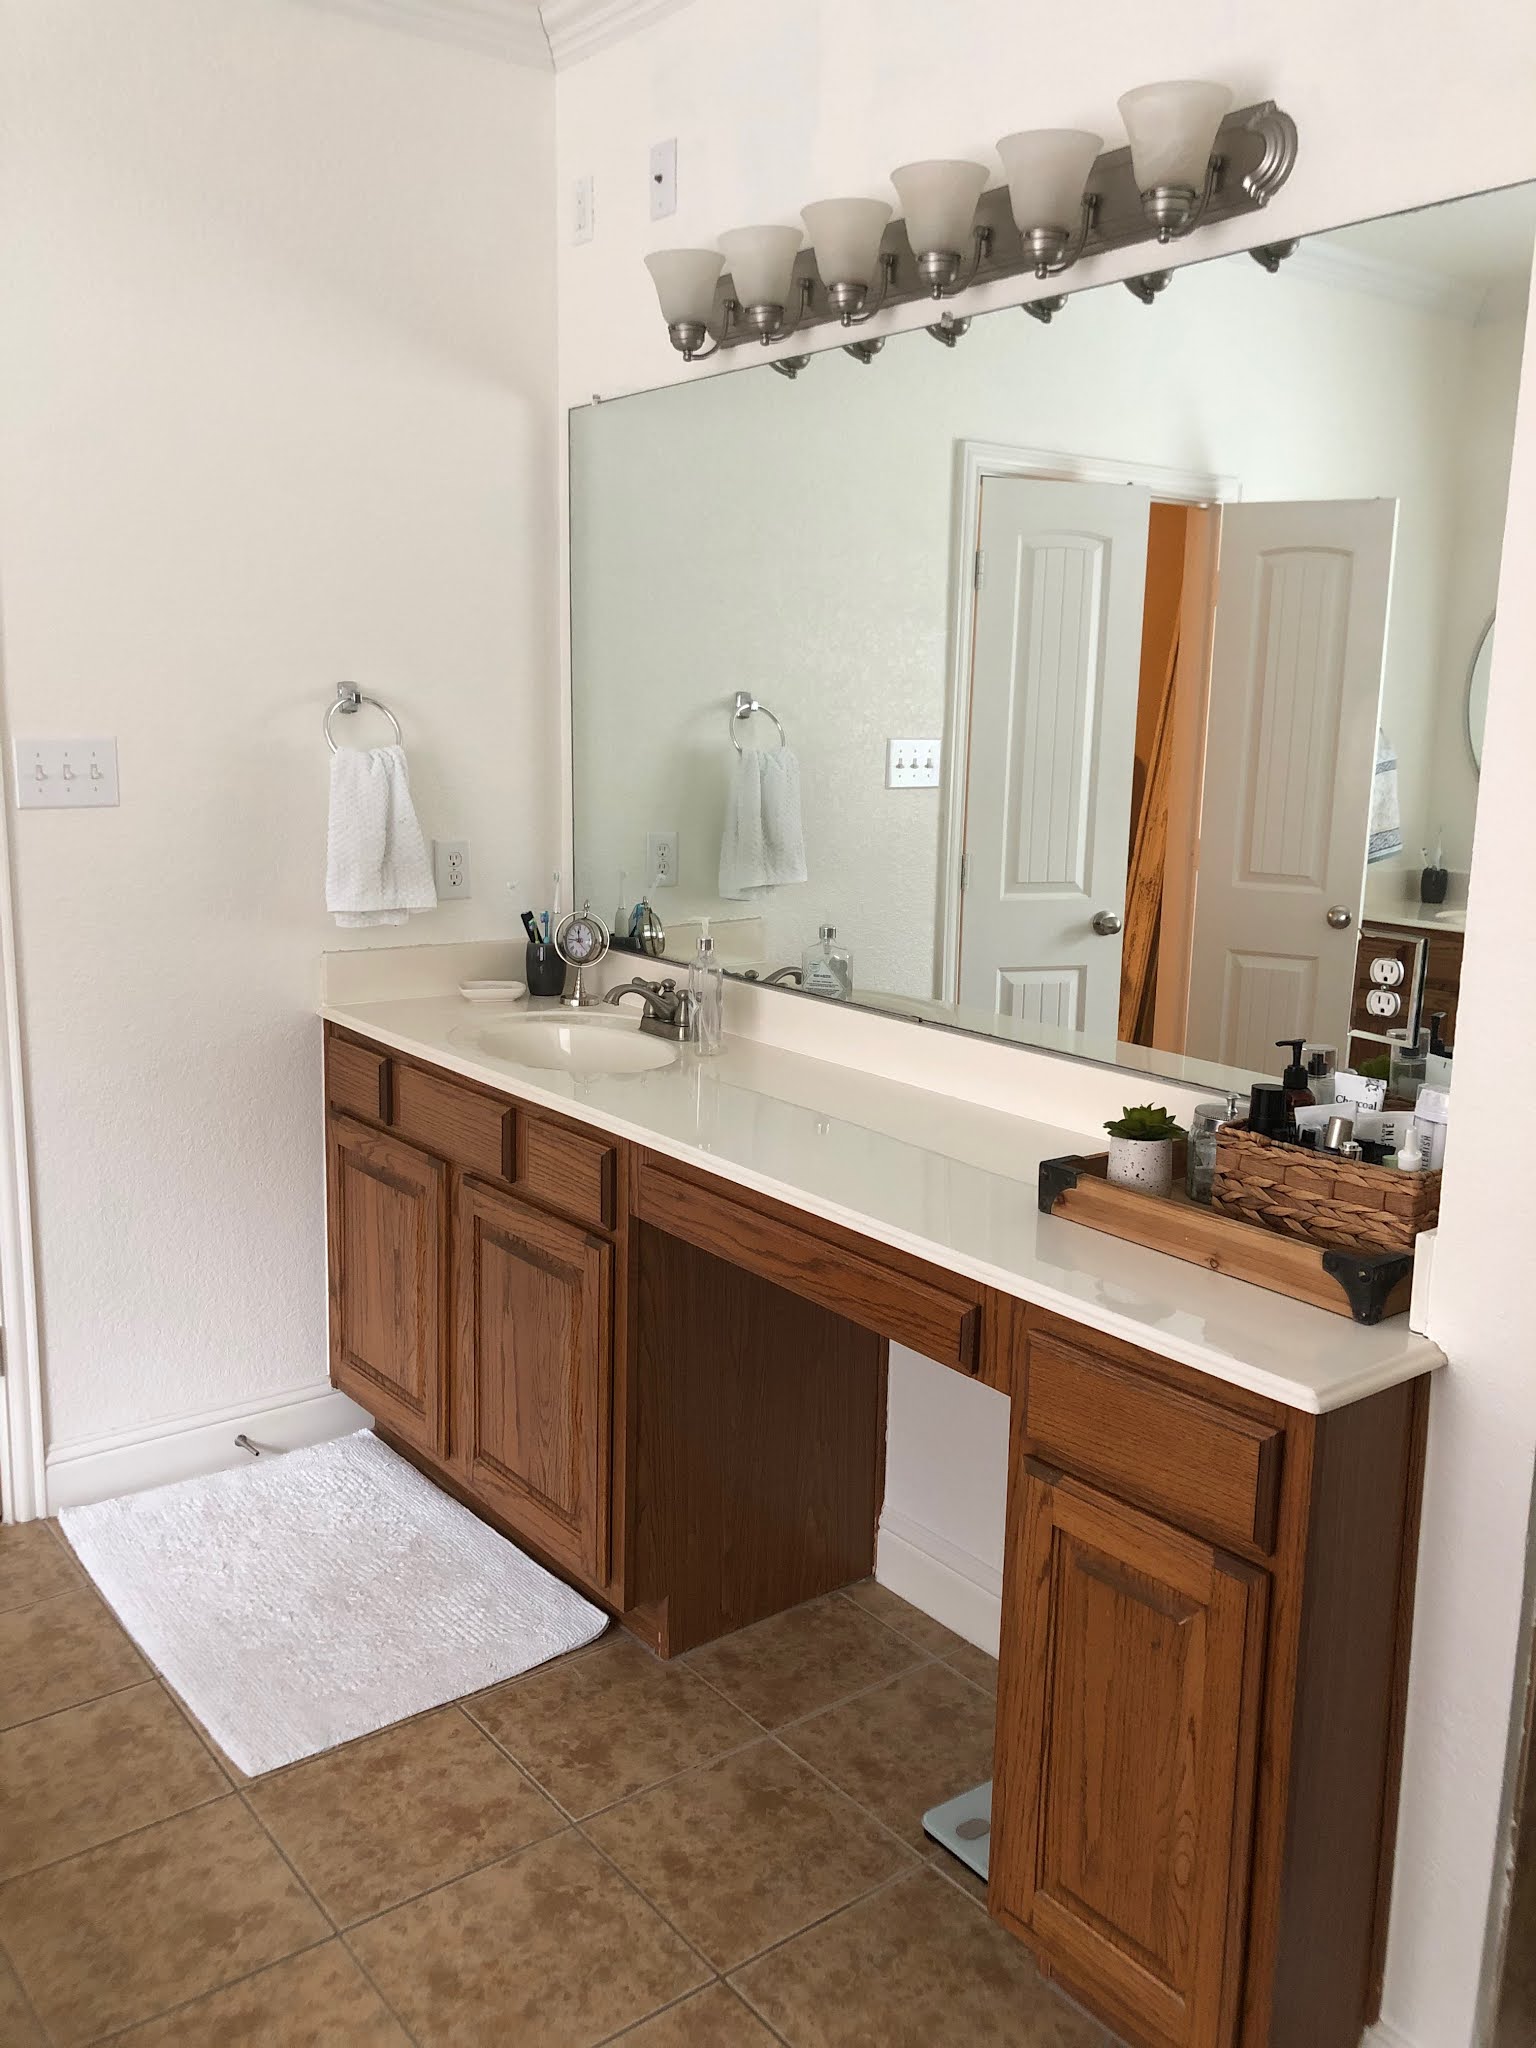
For months, I had been telling Kevin that his vanity mirror was driving me crazy. The builder-grade large mirror was started to fleck in the back and it looked dirty despite my best cleaning efforts. On New Year's Day, I was cleaning our bathroom and Kevin walked through the room. I again commented that his mirror irritated me and he said, "Go get the screwdriver, let's just take it down." I was shocked and had no plan, but I was pumped. We were expecting lots of glue keeping the mirror to the wall, but there wasn't a single drop, which made removal easy-peasy!
Then I was on the hunt for a new mirror. I found this one at Home Goods and instantly fell in love. It was nearly as large as the old square one, which was Kevin's only request. And that's how the whole "snowball" (as Kevin calls it) started...

I decided that it made sense to paint the wall behind the mirror before hanging it, and once I confirmed that the shade of white was good, I began painting all the walls. It took WAY longer than I ever imagined it would, but I finally finished and re-assessed.


The fresh coat of paint seriously helped brighten everything up...


But then I decided to paint the cabinets :) I had several inspiration pictures on Instagram, but in the end, I couldn't find the color I really wanted. I ended up bringing several paint chips home and Kevin and I finally settled on a color called Blueprint.
I started by lightly sanding and cleaning the cabinets, but when I started priming, I worried that I had made a mistake. It was so blotchy and I wasn't sure if I had done something wrong or if maybe I had cabinets that couldn't really be painted.


But after two coats of primer, things starting looking better and I had renewed faith in my project. Then it was on to painting! The color was beautiful, but again, I second-guessed my choice. I worried that it looked like a "country blue", but it was past the point of no return in my book.


Then it was time for the big floor project! I watched and read many tutorials about this process, and unfortunately, most of them recommended different products. How was I supposed to know what to use??
One day, while staring at all the paints at Home Depot, an employee came to offer assistance. Not only was he super helpful, but he called the Behr rep to ask more detailed questions about my specific project. Based on that conversation, I went with Porch and Patio paint. Kevin removed all the old caulking around the perimeter of the bathroom, I did a light sanding and cleaned the floor, and then it was time to paint.

Kevin's back was hurting after all that caulk removal...


When we removed the tape, some of the paint came up and I started freaking out. Was this not going to be very durable??

Kevin climbed over to the bathtub and did the touch-ups while I crossed my fingers...

It worked!! And everything was looking nice and bright...


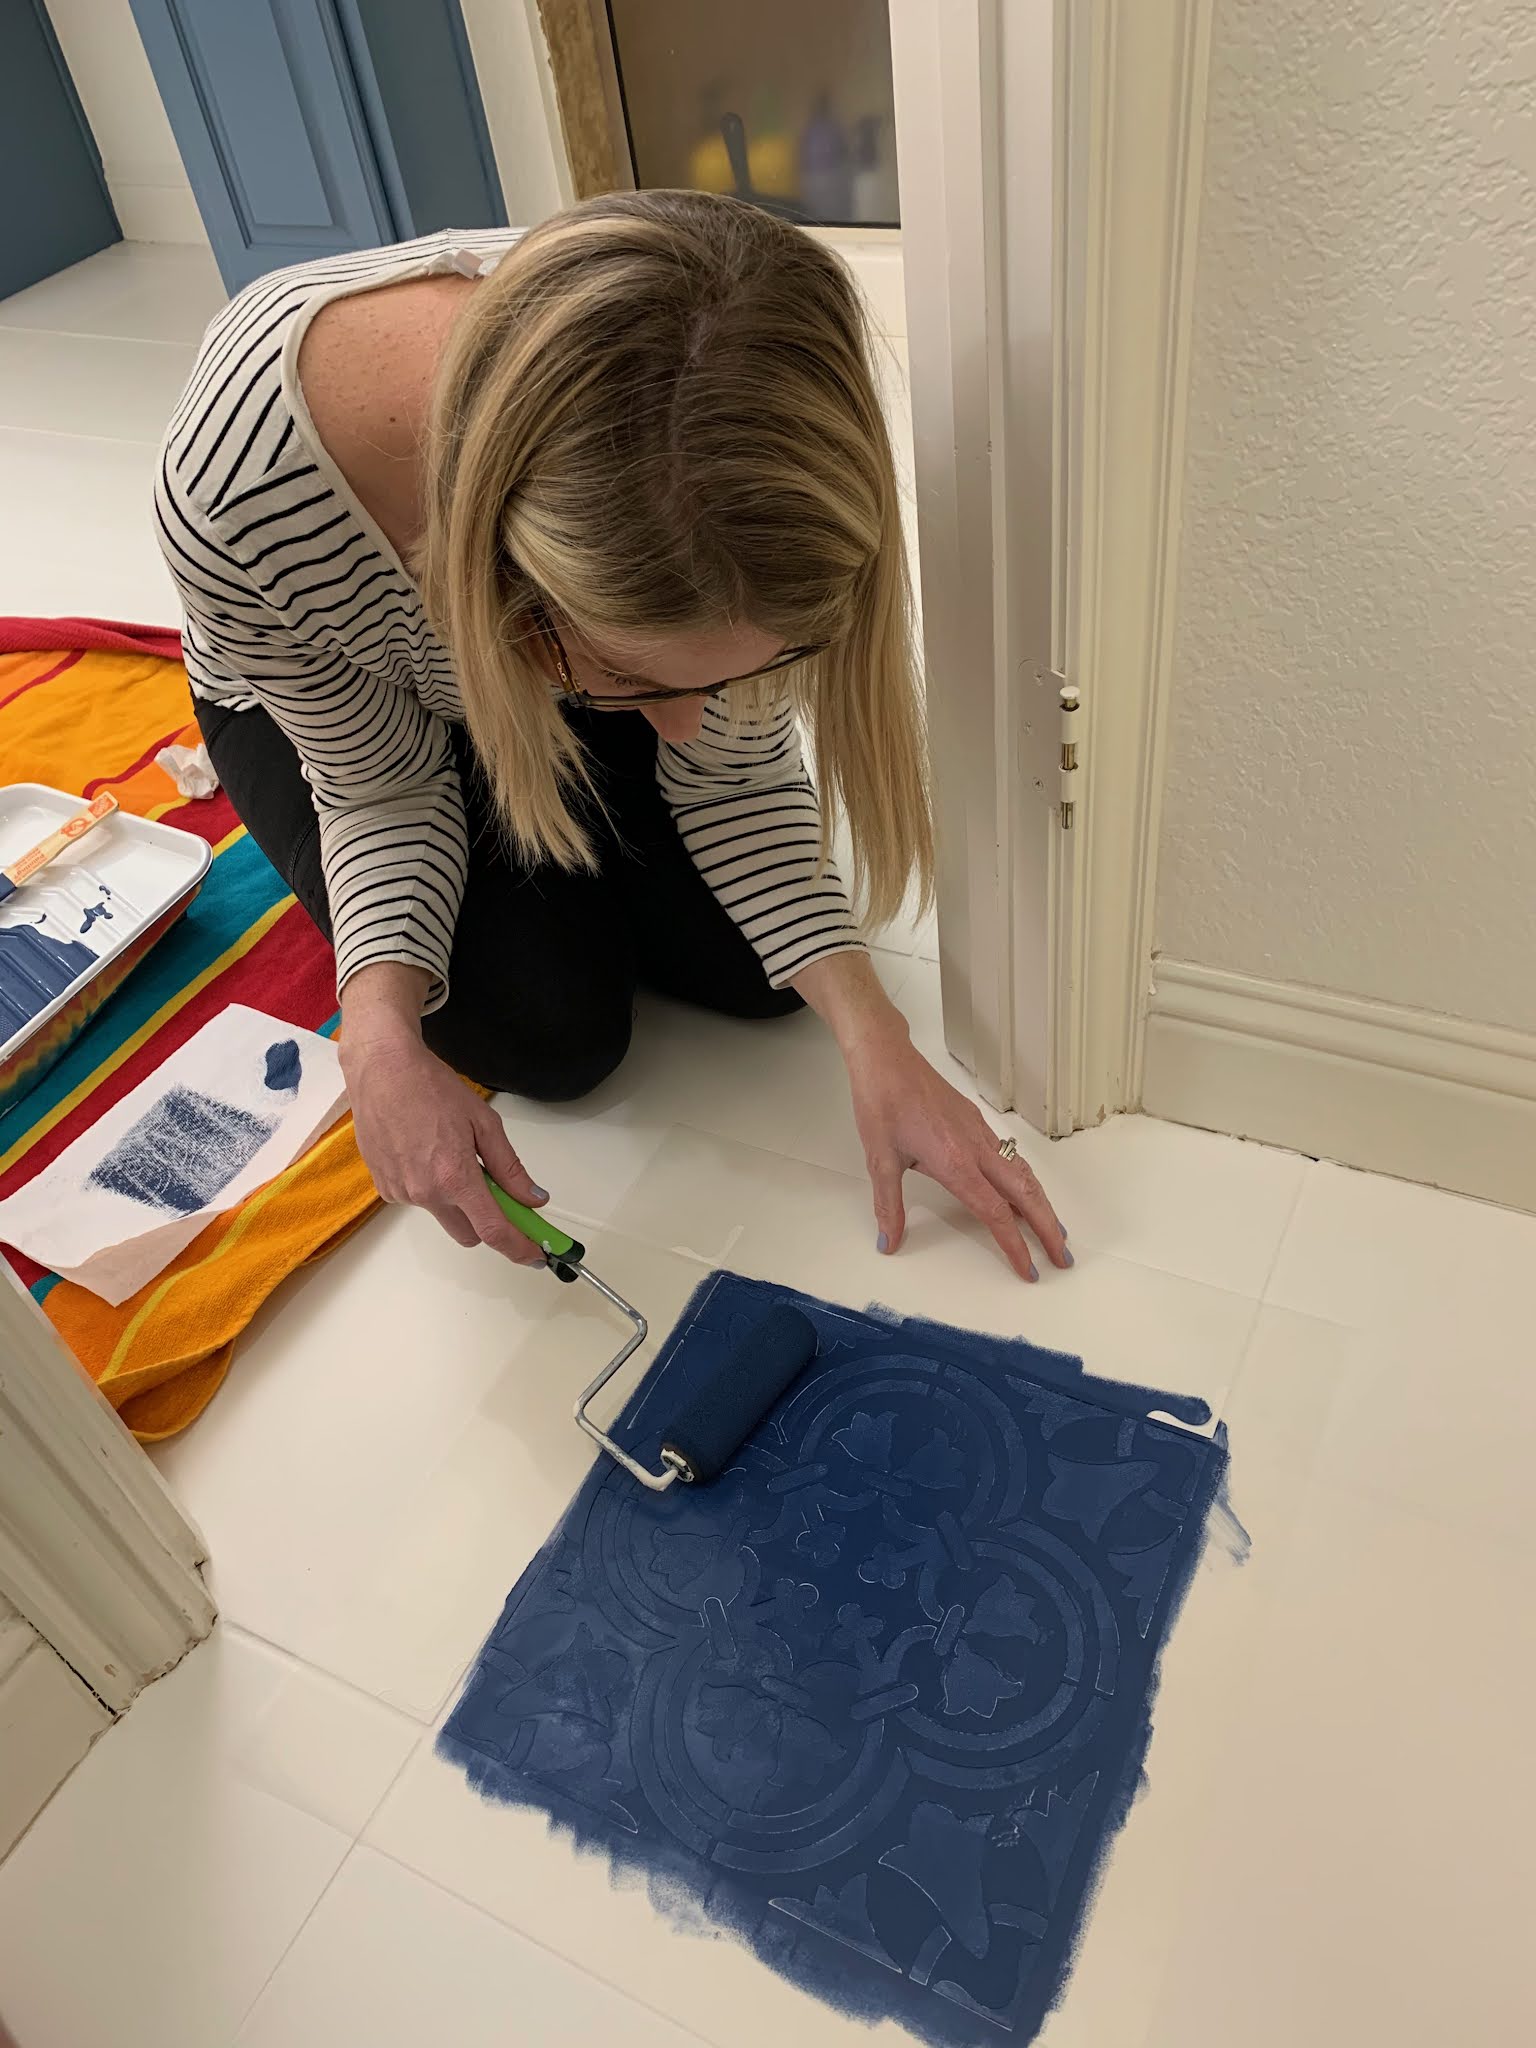

It turned out pretty good! I started off using stencil adhesive on the back of the stencil, but I quickly learned that it messed up the white, so I opted to not use any adhesive at all. Without the adhesive I noticed more paint bleed, but I figured out a system after 5 or 6 repetitions.


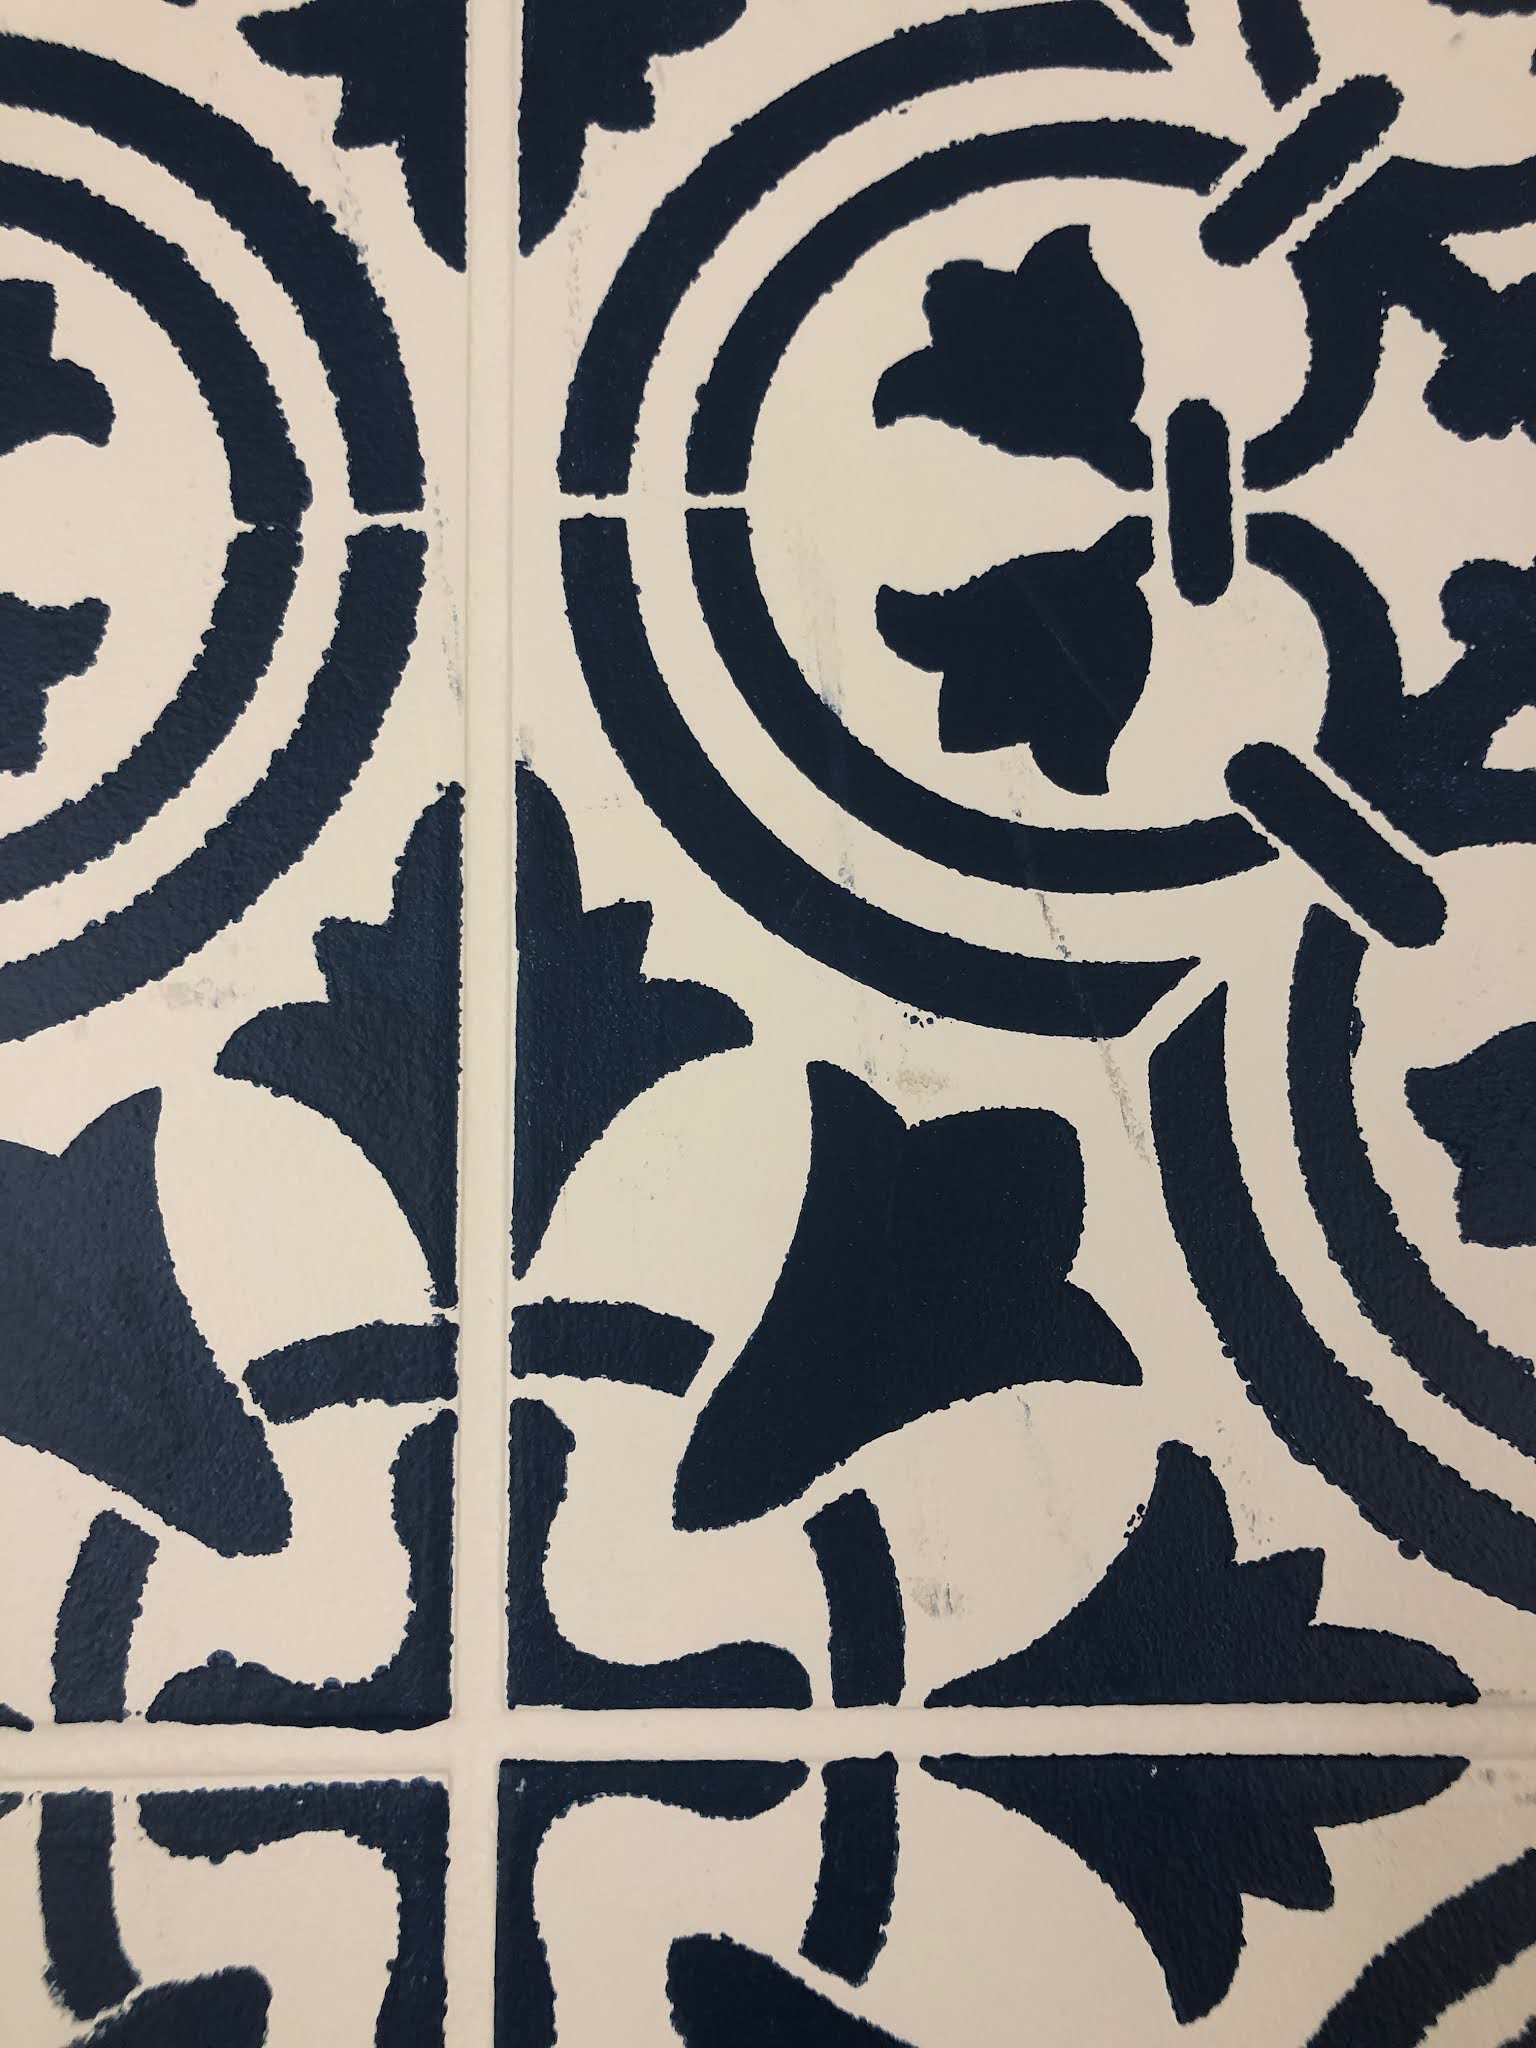
It was a slow process, but the result was exactly what I was hoping for.


Once I finished all the full pieces, the true challenge started! I had ordered two stencils (according to the manufacturer recommendations) so I could cut one down for partial pieces, but it really didn't go as I thought it would. I started with the biggest partial pieces, but there were so many different shapes so I didn't see how I could really cut the stencil. I tried to do a few big ones, but once the stencil was cut, it wouldn't lay down well and then major paint bleed was happening. So, I ended up stenciling what I could with the full piece, then pressing the stencil down and tracing the rest of the design to then go back and hand paint. If that sounds like a long process, it most definitely was :(


Fast forward a few hours when I walked into my bathroom and saw a few pairs of shoes at the door of my closet. I immediately realized what had transpired. I looked to the tile and saw black marks all over. It never crossed my mind that they would be walking from the closet THROUGH the bathroom in those shoes. They definitely knew better after a million lectures about being careful. I immediately started crying. The kids saw me and asked what was wrong. Through tears, I questioned them about what they were thinking. They KNEW how many hours I spent on that floor, and I was baffled as to why that didn't cross their minds as they clomped back and forth on my newly painted tile floors. I was SICK! Not just mad, but so SO sad. I don't even know how many hours I put into the stenciling, but now I had little black scuffs to cover up.


 The kids tried to console me with hugs and apologies, but I just needed time to get over this one. Colby told me a while later,"I had a prompting that we shouldn't do that, but then I still did it. I'm really sorry, Mom." When I told Kevin, he commented that maybe this was a teaching moment for Colby, but I was still upset about the teaching moment, haha.


I already planned on doing touch-ups, but I most definitely had more than I originally planned for. In total, I spent 10 hours touching up paint before I was feeling very DONE with the whole thing. I planned on sealing it all that night after the kids went to bed. When I showed Kevin that evening, I found one more spot that I had missed. His reaction was, "Just take your time. Maybe wait a few days in case you find more spots that you missed." I know his intentions were good, but I most definitely did not want to "take my time", I was over this project and just wanted to seal it before it could be ruined again.
So, here was the competed floor two days later after 5 coats of water-based polyurethane...
 Once the floor was done, I moved on to painting the tile around the bathtub. I used the same method as the floor (clean, sand, prime, paint, seal), but it was a whole lot easier since I wasn't stenciling. The hardest part of this step was removing the faucets, haha. Here are the before pics...

 During...
 And completed...


 I freaked out when I started because it was like painting with milk. You simply mix Part A with Part B, wait 5 minutes, then start painting, but I wondered if I was doing something wrong. I just kept going because I wasn't sure what else to do. By the time I finished the first kit, the epoxy was so thick it was like painting with glue. Surely, there could have been a happy medium, haha.
 You could see all the lines from where the old shower doors were placed, which was really frustrating because I spent forever with a razor blade scraping off the old caulking. I had also followed the cleaning and prep instructions to a T!
 The first kit barely was enough for a single coat...
 I let that dry, then went it with my second kit to hopefully get a thicker coating. It was definitely better, but it still needed at least one more coat. Well, I had only purchased two kits from the sketchy warehouse, so then I was on the hunt for more. Luckily, Home Depot had it back in stock online, so I was able to get it a few days later. I bought two kits, just in case!!
 By that time, I had a system down. After mixing the two parts together, I waited 10-15 minutes until it was slightly thicker, then worked quickly before it became too thick. I also painted the shower pan to get a clean coat over everything. I was VERY happy with the results...
 Then we waited for the showers doors to be installed. We received a quote from Mansfield Glass and Windows, but it was more than we wanted to pay. We could order them from Home Depot and do the installation ourselves, but that was a little scary to both of us, haha. So, we opted for a local guy we saw installing frameless shower doors on a neighbor's home and his prices were a good middle ground. He was very easy to work with, but installation day was a little scary. I was trying not to hover, but I wanted to oversee the process and make sure they didn't damage my work :) The contractor saw the shower before and I had explained that I was going to do an epoxy kit myself.


Next, I painted trim in the water closet and around all the doors. I also painted the back side of the water closet door because it was really yellowed for some reason. I used Cabinet and Trim enamel tinted the same color as the walls.

The last step was the shower! I had the HARDEST time getting a hold of the correct product for this task, but in the end, I finally found some at a somewhat shady warehouse. I first removed the shower doors, with a little help from Kevin :) Boy, was I happy to see those go!! They had so much hard water/corrosion that I couldn't clean properly and it made me feel irritated every time I took a shower.
The before...


During...


The epoxy kit was so beyond smelly! I had a fan going, windows open in my room, and wore a respirator. I thought I had the situation under control, but I failed to close my bedroom door, so the smell soon traveled to the rest of the house as well. We obviously weren't sleeping in our room during this process, but unfortunately the rest of the house still had a bit of a stench as well.


After they had installed the first piece, I snuck in to see how it looked. What I immediately noticed was that it looked a little off center. I didn't know how to say it nicely, so I just tried to pose the question about whether or not it was supposed to be centered on the white trim. He held up his level and told me it was level, but when I continued questioning, he remained firm that "it was level." I didn't really now what else to do, so I just hoped for the best. After they installed the door, I went in to check things out. The two panels weren't exactly lining up, and again, I questioned if it was because the stationary panel was crooked. I was assured that it wasn't that, so they ended up removing the door panel and making new holes. I was outside the room freaking out because I had no idea how that would affect the shower walls or the stability of the door placement.
But in the end, it all lined up and I only had two tiny places to fix the epoxy. So, hopefully it holds up!


The final reveal...


I never did a final tally of how much I spent on this project, but I feel like it was totally worth it!
It definitely took WAY longer than I anticipated, especially since it totally snowballed (like Kevin predicted), but I feel proud of what I was able to accomplish with paint, time, and a few tears :)
I didn't really want to add hardware, but after a few months of opening and closing the drawers, I noticed little chips in the paint above the drawer openings. So, I bought some hardware and after keeping them in the closet for weeks, we finally found the time to install them. I did the measuring and marking, Kevin did the drilling (with a little help from Colby).
Here is the before...


The hardware added the perfect finishing touch! It's not only beautiful, but functional as well. I've never been so happy to be finished with a project, haha.


No comments:
Post a Comment